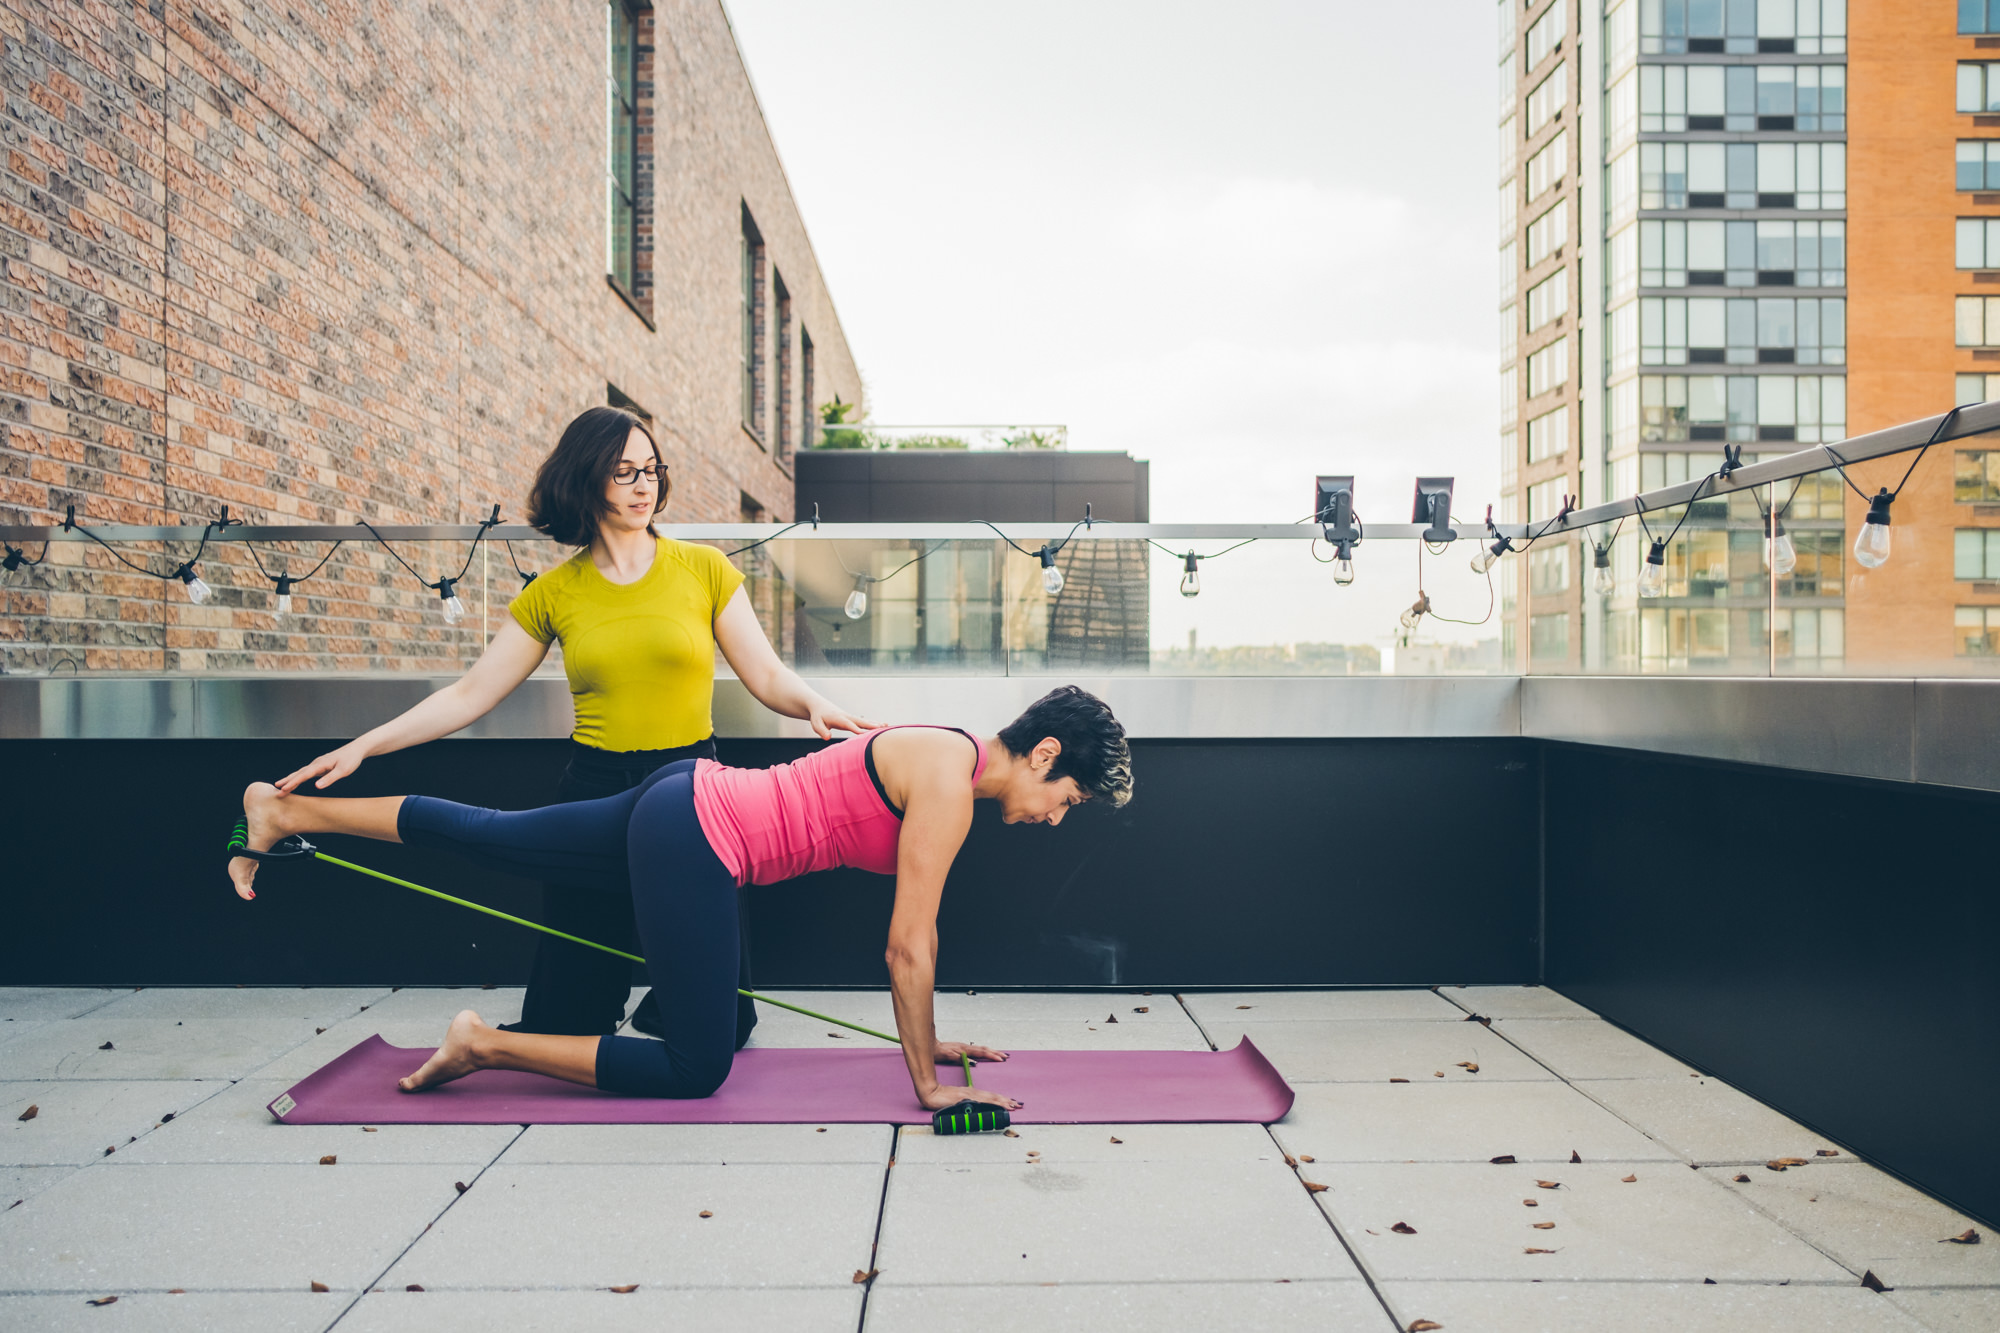
Posture is one of the most important aspects of physical health and overall attractiveness, but for some reason it is often overlooked. This short, simple series, requiring little to no equipment was created by Morgana Mellett, a Personal Trainer, Yoga, Pilates, and Barre instructor based in NYC for the recently published health and wellness book, THRIVE. This series will help you focus on each part of your body to improve posture and awareness. Do the series as often as possible, aiming for once a day.
Equipment:
- Mat
- Chair
- Countertop to hold onto
- Yoga strap or belt (optional)
- Yoga block (optional)
- Attire: Comfortable clothing that you can move in. All exercises are intended to be performed barefoot.
Relaxation Pose
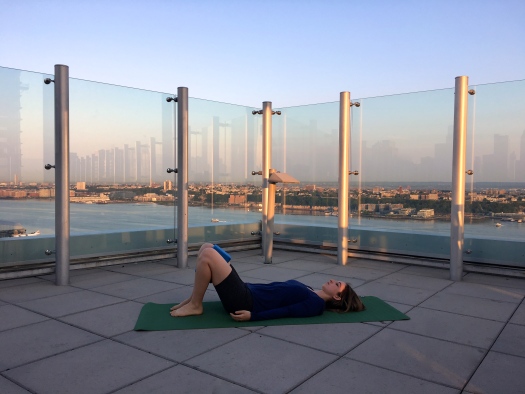
Benefits: By placing the spine and pelvis in a relaxed, neutral position and allowing your breathing to deepen, you encourage your body to relax and release patterns of tension and poor posture. The relaxation pose cleans the slate in preparation for developing postural awareness.
Set-up: Rest on a mat facing up with knees bent, feet on the mat (parallel and hip-width distance apart), and arms resting comfortably by your side.
Movement: Allow the eyes to become heavy and/or closed. Focus on your breath moving slowly in and out of your body. Scan your body for places of tension or discomfort. Send your breath into these areas, exhaling the tension out of the body.
Modifications: If the knees want to collapse inwards, place a yoga block between the thighs to keep them parallel and hip-width distance apart. Rest your hands comfortably on your chest or abdomen if preferred.
Repetitions: Remain in the pose for at least 1 minute, and try to work toward holding the pose for 5 to 10 minutes.
Neck strengthener
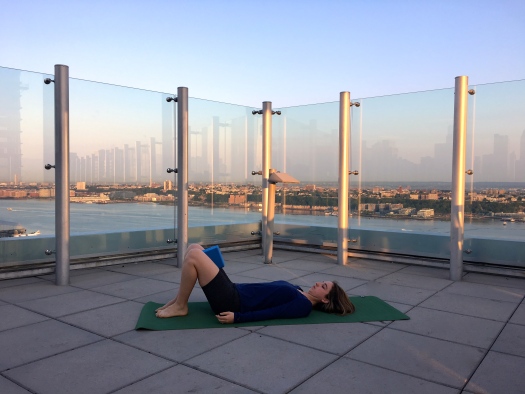
Benefits: This exercise strengthens the muscles of the neck and addresses your tendency to stick the chin forward when you are texting, eating, washing dishes or engaged in other daily activities.
Set-up: Rest on the mat facing up with knees bent, feet on the mat (parallel and hip-width distance apart), and arms comfortably by your side.
Movement: Press the back of your head into the floor slightly, tucking in your chin. Feel the muscles in the front of your neck engage. Keeping your chin slightly tucked, lift your head off the floor only enough to slip a piece of paper under the back of your head. Do not try to lift your head high; the goal is for your head to barely hover above the floor.
Repetitions: 10 repetitions for 5 seconds each. Gradually build up to 10 seconds.
Abdominals/Plank
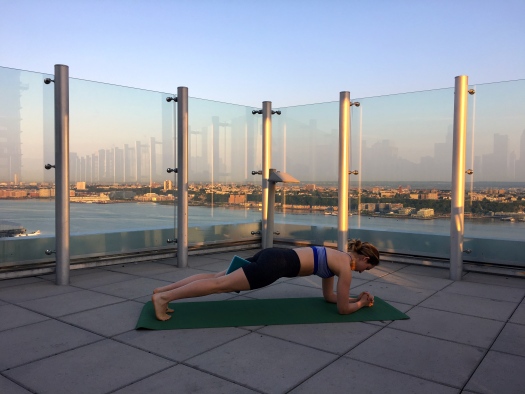
Benefits: This exercise strengthens and engages the deepest abdominal muscles for improved postural and lower back support.
Set-up: Lie on floor facing down, propped up on your forearms.
Movement: Tuck your toes, pull your belly button into your spine, and keep it engaged throughout the exercise. Press into your forearms, and lift your body off the floor into a straight plank position. Engage the muscles of your core, thighs, and glutes, and press into your forearms. Check that your hips are in line with your head and have not gone upward or sagged to the the floor.
Modifications: To make this position less challenging keep your knees on the ground. Add a block between the thighs to help engage the pelvic floor and inner thigh muscles.
Repetitions: Hold the plank position for 10 seconds, rest, and repeat 6 times. Eventually build up to holding the plank position for a full minute.
Glute Bridges
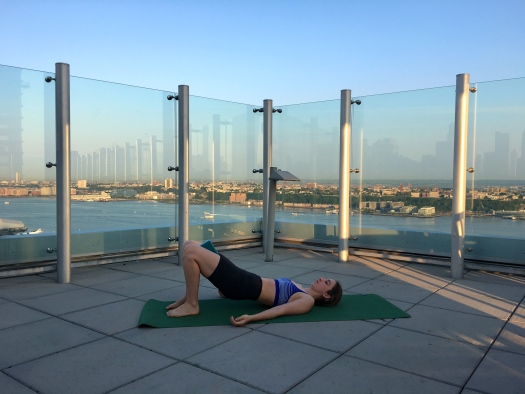
Benefits: This exercise strengthens the muscles in the back of your hips and thighs that support standing, walking, and other physical activities.
Set-up: Rest on the floor facing up with your knees bent, feet on the floor (parallel and hip-width distance apart), arms by your side, and your palms pressed gently into the floor.
Movement: Pull your belly button in, and press your lower back into the mat. Engage your buttocks and inner thighs. Lift your hips a few inches off the floor, continuing to engage the muscles of the glutes, hamstrings, inner thighs and abdominals. Do not press your hips all the way up, if you do, you will not engage the targeted muscles. Roll down through the spine, lengthening out the lower back until you return to a relaxed spine position.
Modifications: Place a block between your thighs to keep your feet and legs parallel and hip-width distance apart. To make the exercise more challenging, reach one foot forward without shifting or tilting.
Repetitions: Repeat 10 times, holding for 5 seconds at the top, and rolling slowly and smoothly through the spine to go up and down.
Back Extension
Benefits: This exercise strengthens the upper back and reverses the forward rounding posture common to everyday activities.
Set-up: Lie on your chest, bring your legs together, and extend your arms out to the side with your palms facing down.
Movement: Pull your bellybutton up and into your spine and keep it there to protect your lower back. Press your hands into the floor, and lift your face, neck, and upper back slightly off the floor. Lift your hands off the floor. Focus on engaging your upper middle back, and keeping your abdominals engaged. Keep the chin tucked so that your neck is in line with your spine.
Modifications: If this bothers your lower back, try pulling your belly button in more deeply and open the legs slightly apart. To make the exercise more challenging, add holding a light weight in both hands.
Repetitions: Hold position for 4 seconds. Repeat 10 times.
Shoulders/Chest Opener
Benefits: This exercise strengthens the muscles of the upper back and opens the chest, reverses the forward rounding posture common to everyday activities, and opens the front of the shoulders and chest.
Set-up: Stand or sit with feet slightly wider than hip-width distance apart, and clasp your hands behind your back.
Movement: Roll your shoulders up and back. Press your shoulder-blades together and down your back until you feel the front of your chest opening.
Modifications: Join your palms together if you can. If your shoulders are tight and this is not possible, interlace your fingers, or use a yoga strap.
Repetitions: Hold the position for 10 seconds. Repeat 5 times or throughout the day.
Squats
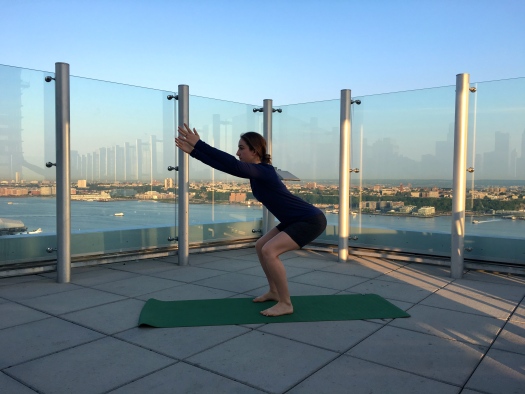
Benefits: This exercise strengthens the muscles responsible for healthy sitting and standing postures.
Set-up: Sit on a chair with hips, knees and feet flexed at a 90-degree angle. Be sure you can comfortably sit with your feet planted on the floor. Your feet should be parallel and hip-width distance apart.
Movement: Lean forward by folding at the hips. Look ahead and slightly upwards, keeping your spine flat. Pull your belly button into your spine, and press your feet into the ground to come up into a standing position. Go through the same movements in reverse to sit back down on the chair. Make sure your knees are tracking over your toes and you are pressing into your feet, engaging the thighs, glutes, and abdominals, and maintaining a straight, neutral spine.
Modifications: If the movement is difficult, reach your arms forward, or use a solid object (e.g., a countertop) to facilitate the movement.
Repetitions: Repeat slowly for 10 times, and mindfully go through these same motions any time you sit down or stand up from the seated position.
Feet Rocks
Benefits: This exercise strengthens your feet and ankles and facilitates healthier postural alignment.
Set-up: Stand with your feet parallel and hip-width distance apart, hold onto a countertop.
Movement: Pull your belly button into your spine, open up your chest, and gently engage your upper middle back. Check to see that your neck is in line with your spine and that your gaze is directly forward. Rock back and forth, shifting your weight backward onto your heels with your toes lifted, then forward onto the balls of your feet with your heels lifted.
Modifications: Make the rocking motion smaller or bigger, depending on what feels more comfortable to you.
Repetitions: Repeat 10 times, back and forth.
This series was originally published in THRIVE: An environmentally conscious lifestyle guide to better health and true wealth by K. Chayne
Morgana Tessler is a Certified Orthopedic Personal Trainer, Yoga, Pilates, Meditation and Barre Instructor based in NYC. Morgana offers private and group fitness sessions. For more information visit www.morgana.nyc Facebook, Instagram
